We routinely update our Skins to add functionality and improve performance. Follow the steps outlined here to update your Skins and to ensure your site is always on the cutting edge.
How Updates Work
Every 24 hours, your WordPress site automatically fishes for updates to Thesis, Skins, and Boxes.
To see if you have a Skin update available, visit the Manage Skins page in your Thesis Admin (Thesis → Skin → Manage Skins).
Updating Your Current Skin
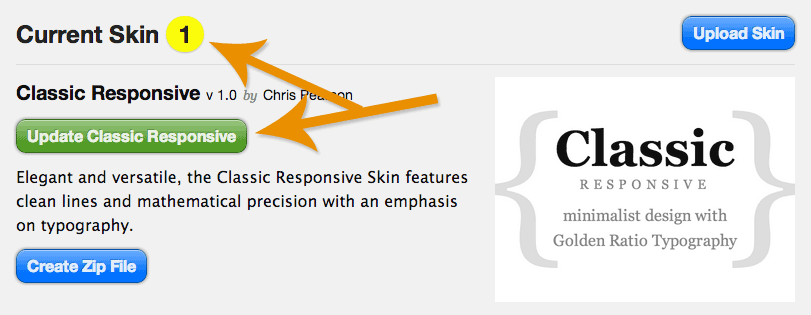
If an update is available for your current Skin, you’ll see a highlighted update notification number at the top of the page. Look for the green update button underneath the name of your current Skin, and then click it to get the update.

No worries! When you update a Skin, your Custom CSS and custom.php file will remain unchanged. This ensures your custom data will always remain intact!
Updating Installed Skins
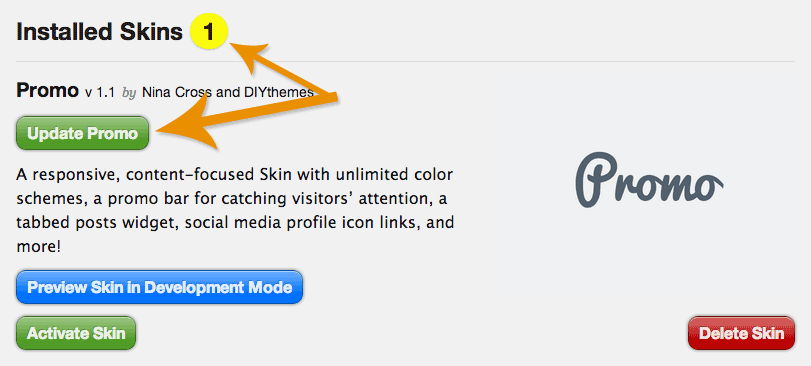
If updates are available for any other Skins you’ve installed, you’ll see a highlighted update notification number next to the Installed Skins heading.
Each Skin with an update available will also have a green update button beneath the Skin name; click this button to update your Skin.

Enhanced Updates with the Developer Tools Box
You can use the Developer Tools Box to enhance your Thesis updates.
First, you can turn on developer updates, which will give you early access to beta releases of Thesis, Skins, and Boxes.
Warning! Due to the unstable nature of beta releases, we do not recommend using developer updates on live production sites.
Second, no matter which update channel you’re on (regular or developer), you can force Thesis to check for updates by clicking the blue Check for Updates button.
This way, you won’t have to wait for WordPress to fish for Thesis updates; you can simply force it to look whenever you like.