This User Guide entry was originally written for Thesis 2.0. In Thesis 2.1, this tutorial is recommended only for those using a Static Front Page.
Using “teasers” was a popular configuration in earlier versions of the Thesis theme.
Teasers consist of several things: the title of a post, the author and date byline, an excerpt of the post, and a “thumbnail” image assigned to the post.
By default, Thesis teasers were “two across” — there were two teasers per horizontal row. CSS changes could also create “teasers one across” — one teaser per row.
While teasers are not a default display type in Thesis 2.0, they can be created using the flexibility and ease of the 2.0 interface — no PHP needed!
How? Let’s build some “teasers” in Thesis 2.0 — in fact, let’s get teasers in both one- and two-column formats, where the only difference is one line of basic CSS.
Two Different Teaser Layouts
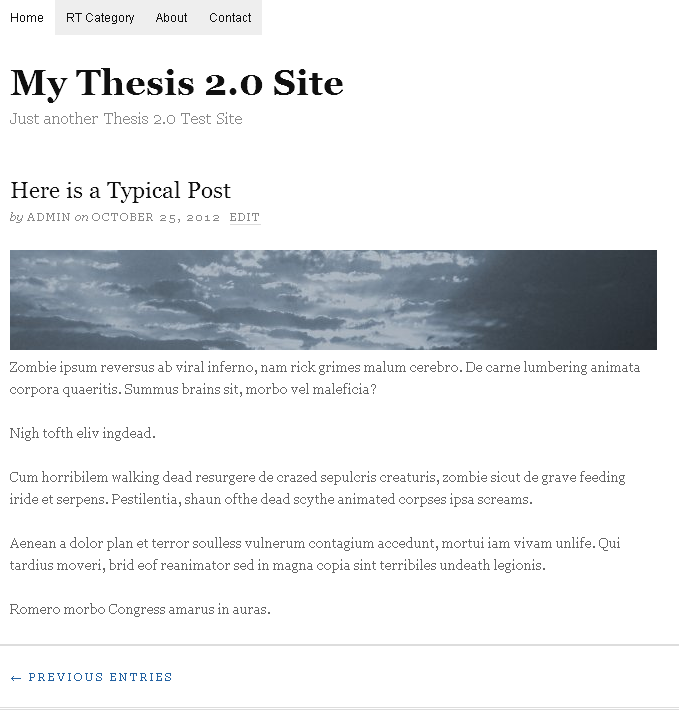
Before we get too deep into this, let’s set a “before” and “after” goal. Before the addition of teasers, we’ll presume a single “full” post on the home page.
First we’ll build a set of teasers using the Thesis wp_query box, and then we’ll examine the differences between one-column and two-column teasers.
First up, the “before” picture — this is a Thesis 2.0 site running the “Classic” skin:
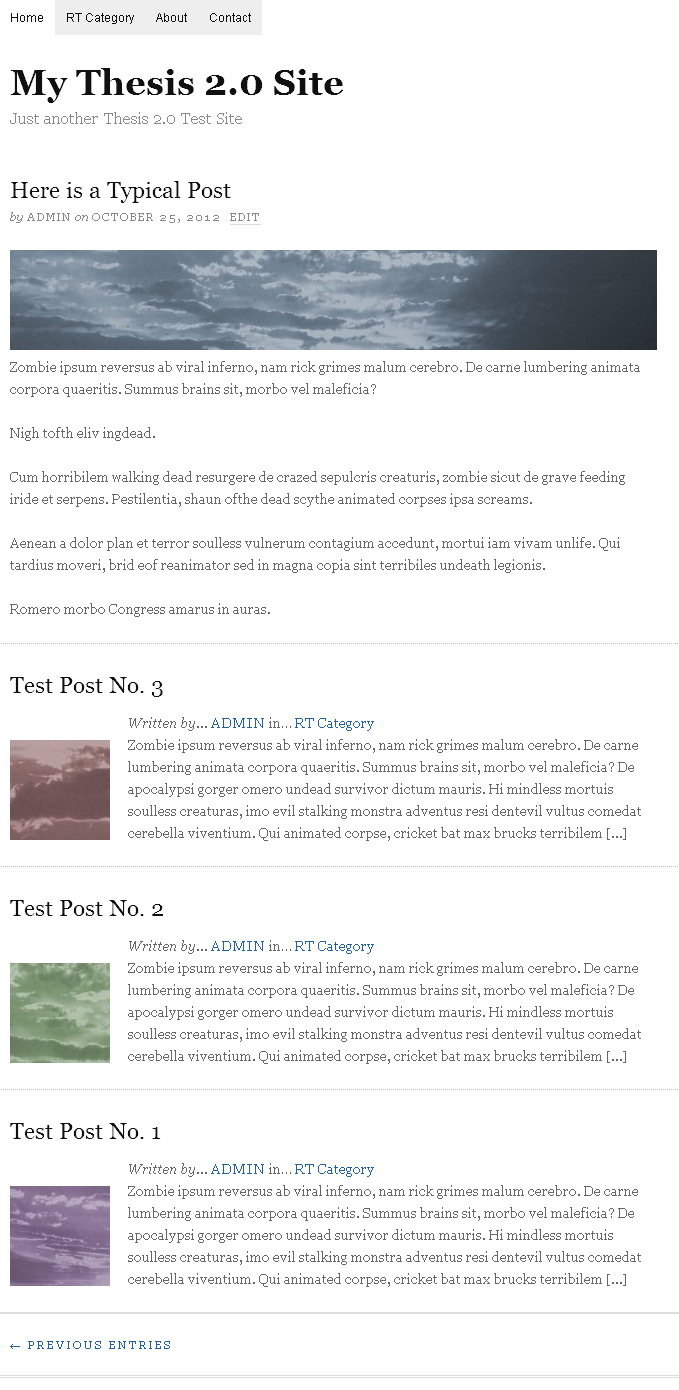
Below is a “one-across” teaser layout, complete with thumbnails. While “taller” vertically than a two-column teaser layout, usability studies suggest that “teasers” in a one-per-line format are minimally disruptive to eye-scanning down the page.
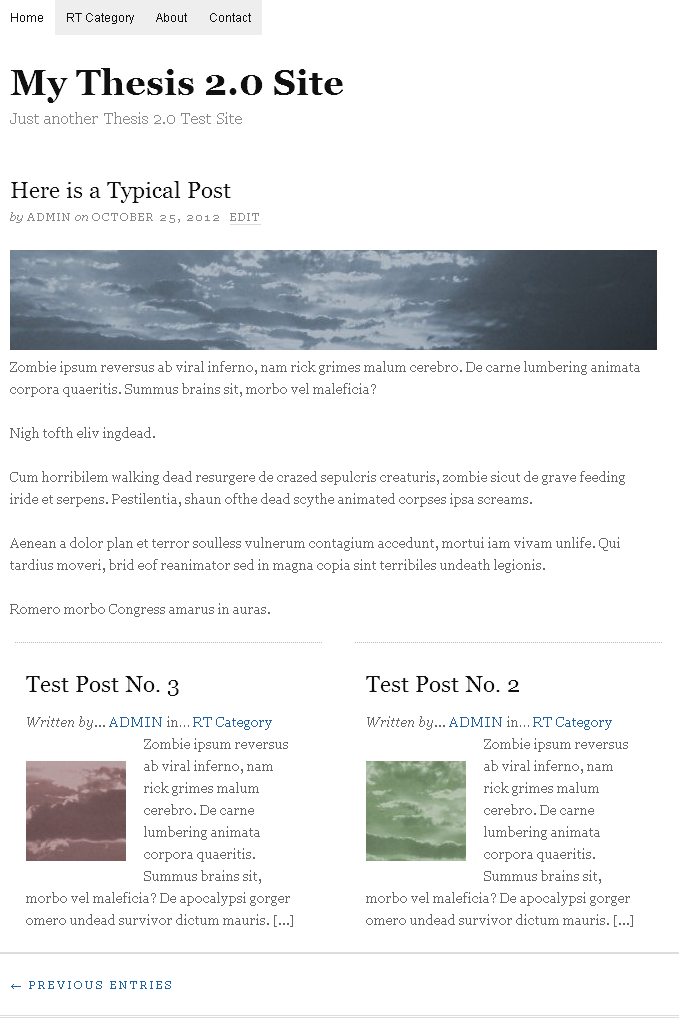
Finally, we have a two-column teaser layout. More compact than one-across, in part because the third teaser has been removed for reasons of space here, this format was extremely popular in the Thesis 1.x software.
Note, however, that a two-column layout for the content column is not ideal for most site designs — in short, skimming non-linear content is more difficult for your visitors.
To include teasers, this tutorial assumes a minimum of four (4) posts live on the site. This presumption allows for the current, full post — and then also the additional posts that will be pulled-in to create the “teaser” components — the post title, byline, thumbnail image, and excerpt.
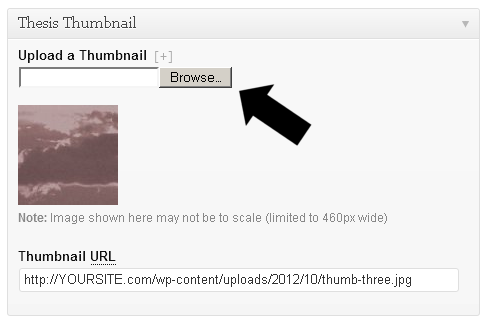
Also, the posts we’ll be calling must have an assigned thumbnail image. We’ll use the Thesis thumbnail in this example, and the assigned thumbnails would be added via this process: WP Admin > Posts > Edit > Thesis Thumbnail > Browse.
Uploading a thumbnail image from your desktop is a simple click-and-go process:
With a set of “thumbnail assigned” posts to use in our teasers, it’s time to dig in!
Using the Thesis Skin Editor to Create a WP_Query Box
As with anything “2.0” there are various methods and approaches that can achieve a desired outcome.
For this tutorial, we’re going to use one method… the “Query Box” in the Thesis Skin Editor’s HTML tab. Here’s one way to get there:
WP Admin > Thesis > Skin Editor >
You should now be on the Home core template.
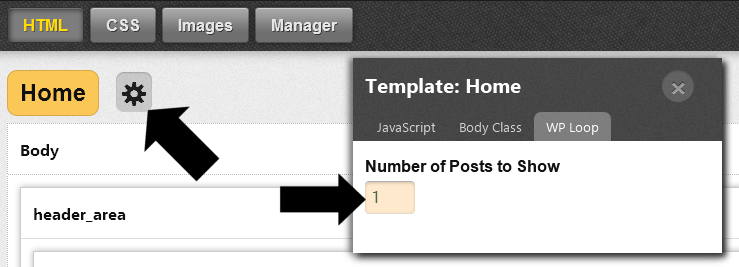
Optional. To change the number of posts that display on your home page, simply hover on the Home text, click the gear icon, in the pop-up, click the WP Loop and adjust the value of Number of Posts to Show. The images in this tutorial are based on a value of 1 in this area, but you can show as many “normal” posts as you like.
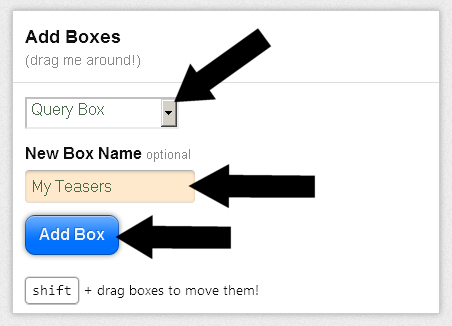
Still on the Home core template of the Skin Editor, look to the lower-right. In the Add Boxes section, click the dropdown, select Query Box, then name your box whatever makes sense to you, such as “My Teasers” in the below. Click the blue Add Box button.
You now have a Query Box — this will create the HTML and database interactions that make a “teaser” — but don’t worry, you won’t see a drop of PHP or HTML, because Thesis 2.0 does the heavy lifting for you.
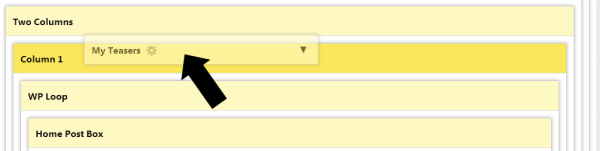
Follow the next step carefully. Confirm that your “Teasers” Query Box is not inside the WP Loop Box. If you add a Query Box inside the WP Loop area, your teasers will cycle after each post in the WP Loop.
Now to shift+drag this Query Box into position. We’re going to demonstrate our teasers after the primary content — the WP Loop — so we’ll drag the My Teasers box into position in the container of the WP Loop area, and let go:
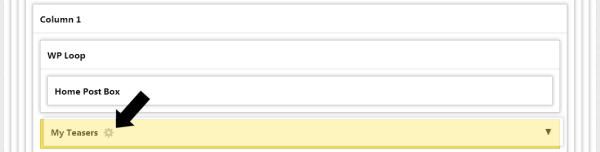
A second quick drag will get your Query Box under the main loop, ending here:
You can see the “gear” in the above. Click it, and you’ll get the following pop-up, where the image below shows “everything” you can do — but the primary areas of interest are denoted with arrows. More on those arrows and associated settings after (you can click to see a larger edition) you’ve had a chance to look this over:

Areas of note: you can change this to suit your needs, but we’re choosing “Posts” and “Recent Posts” as well as the number “3” — this will be how many “teasers” we plan to display.
For single-author blogs, the author and other filters are straightforward. A “div” tag is chosen, and — this is an important one — we manually add the following as our HTML class, or in this case, classes:
teasers_home post_box
One of these, teasers_home, will be used for CSS adjustments in a CSS Package we’ll create. The second class is pre-existing, and the use of post_box — it formats home page posts — reduces the CSS needed to make the teasers match the site.
Next, we’ll rearrange and add “green box” items from the tray to get the elements needed for teasers. We’ll want a headline, author, date, categories the post is assigned to, the Thesis thumbnail image, and the post excerpt.
Once everything is dragged into place, it should look like this. As indicated by the first arrow, begin clicking through each item to assign values, which we’ll review briefly after this image:

Headline “gear” icon settings: HTML tag: H3. And “Yes” you want to link the headline to the article page.
Author “gear” icon settings: The Intro text is up to you; in this example we used Written by... as our intro. The two checkboxes were checked. This is your choice, and selecting or not selecting these will have little impact for tutorial purposes.
Date “gear” icon settings: Intro text used was on... and this as well as other settings here is your choice.
Categories “gear” icon settings: HTML tag: span. Intro text used was in... and the rest is your choice.
The Thumbnail and Excerpt do not have settings worth mention for our purposes in this example.
CSS Packages for Teasers in Thesis 2.0
Guess what? Minus a bit of formatting, your teasers are done!
To get the final touches on making these look great, let’s visit the CSS section of the Skin Editor and add a Package.
In fact, let’s add three “Single Element Styles” to give absolute control over this teasers area — here’s one, where the dropdown was clicked, Single Element Styles was chosen, and the blue Add Package was clicked, bringing a pop-up of the Single Element Styles which will get some additional attention momentarily:
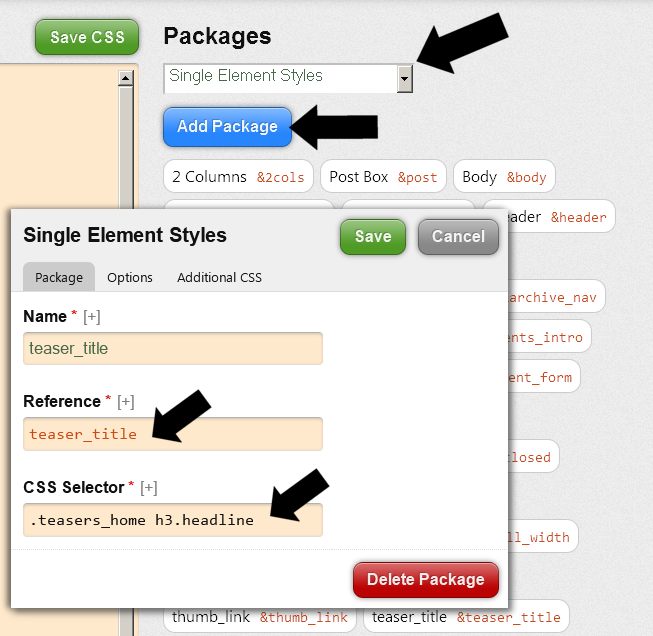
Package Number One — note the “reference” of teaser_title, as this will be added to the left area as &teaser_title along with the other two Packages we’ll create.
The above CSS Package is included here primarily as an enabler. It controls the headline font — the linked title of the teaser — and you can make adjustments to your taste using the central Options tab.
The only changes made to &teaser_title in order to attain the results in this tutorial were: Top Margin: 1px and Top Padding: 1px.
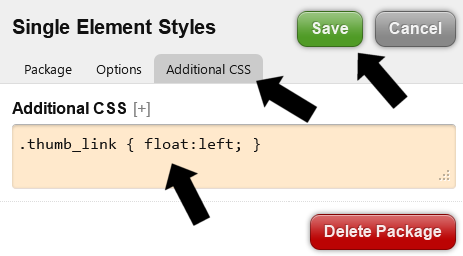
Package Number Two — same steps of Single Element Styles, click the blue Add Package, then work with Single Element Styles where the Package tab was assigned a Reference of thumb_link and the CSS Selector is .thumb_link.
The Options tab of the thumbnail Package were minimal: Top Margin 28px and Right Margin 18px and done.
Finally, the Additional CSS tab gets a single line of code so that our thumbnail “floats” into position to the left of the excerpt:
.thumb_link { float:left; }
To ensure our teasers and thumbnails are still on track, you should be ending in this tab, with this code, and remembering to save:
Package Number Three — last one! As before, same steps, where the “reference” is teaser_excerpt and the only adjustment for this tutorial’s purpose was to change, under Options, the Bottom Margin to 22px.
Final Steps in the CSS Tab — now to make sure our three Packages are compiled as active CSS code for the Home core template. Remember the “references” created when you made these Packages?
Simply add an ampersand — & — before the reference name and type these items into the Skin CSS, hit the green Save CSS button — and just like that, it’s all over:
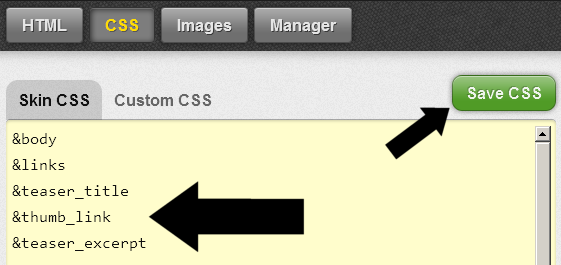
These three Packages are shown “high up” in the image above for instructional purposes. However, it makes better sense to add these Packages farther down to maintain top to bottom ordering.
If you’ve been following this tutorial such that you have the exact same references, you’d add this to the Skin CSS area:
&teaser_title
&thumb_link
&teaser_excerpt
Save CSS, and at that point, you should have three “one across” teasers — a single post’s worth of thumbnail images and excerpts per row — live on your site:
But what about the “old” two-column teasers from Thesis 1.x series?
Teasers Two Across in Thesis 2.0
This, friends, is where a fundamental “oooh!” of Thesis 2.0 should be evident.
Yes, it took some work to get these custom teasers established.
But in doing so, you’ve set the stage for total control.
At this point, additional formatting changes are easy. Title font? Excerpt font size, color, background? Margins? All “interface easy” — simply adjust the three Packages.
And if you want Teasers “two across” — it will take only this one line of CSS:
.teasers_home { float:left; width:275px; margin:0px 16px; }
This code can be entered in several areas of the CSS tab in the Skin Editor.
In this tutorial, the CSS was added to an existing Package created earlier in this guide — the “Additional CSS” tab of the &teaser_title package, as shown below:
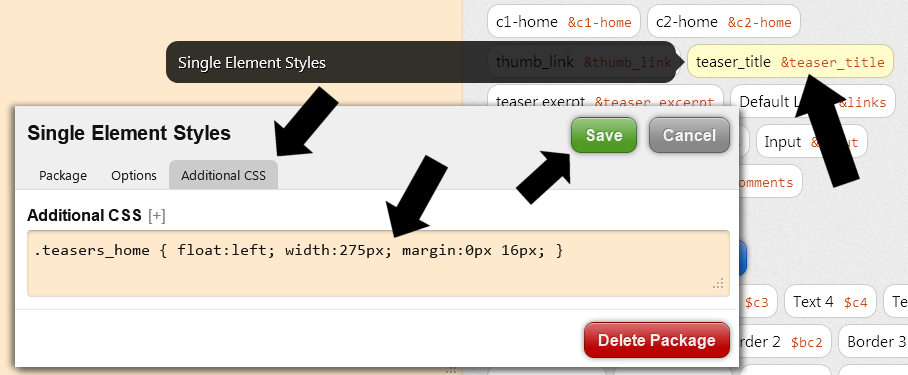
Done. Note that a width of 275px represents a value that you can adjust to get the desired look on your site.
Add one line of Additional CSS, and you’re rocking two-column teasers, with thumbnails!
Excellent!
As you’ve probably realized by now, the Thesis 2.0 Query Box — combined with CSS Packages — opens the door to far more than teasers.
So have some fun — it’s time to let your creativity take over!