![]() If you want to make a few quick web design tweaks to your WordPress theme framework,
If you want to make a few quick web design tweaks to your WordPress theme framework, Firebug the Chrome Inspector can help you do it.
Let me explain.
Firebug provides you with X-ray vision that exposes the HTML elements of your site and identifies the CSS styles at work.
Even better, Firebug allows you to make changes to those styles in real-time, meaning you can make a change and see how it affects your website instantly
Not a coder? No problem!
When you’re using a WordPress Theme framework like Thesis, there are styles attached to each section of your blog—even if you can’t see them in action.
This means, when you start using a web inspector tool like Firebug, all you have to do is add some CSS styles and you’ll be good to go.
Firebug for Firefox Demonstration
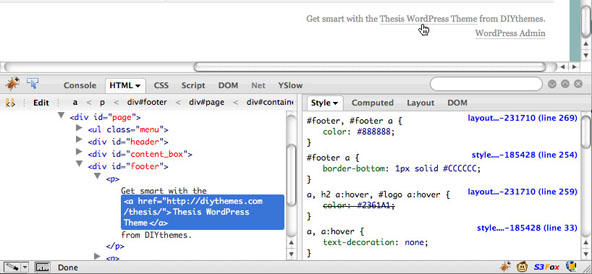
Figure 1. See how Firebug exposes the code and styles associated with the code?
Let’s say you wanted to remove the underline from all of your links in Thesis. You add .custom a {text-decoration: none; } into your stylesheet, save it, and check out your website. In most cases, the underline is gone, as expected. However, there are still a few other links in your Footer that have an underline. What’s the deal?
In most cases, you’d have to dig through your CSS file and discover why those footer links remain unchanged. However, with Firebug, you can highlight the specific link in question, expose the HTML and CSS, and see exactly what’s going on in just a few seconds.
For example, in Figure 1 above, you’ll see that the footer links have a bottom border, which explains why they keep their underline when you remove the text decoration. So, if you wanted to remove the underline, you’d have to remove the bottom border from your footer links
However, what if you want to test out your change before you add it into your stylesheet? Well, as I mentioned earlier, Firebug lets you do that on the fly so you can see the results instantly without affecting your visitors
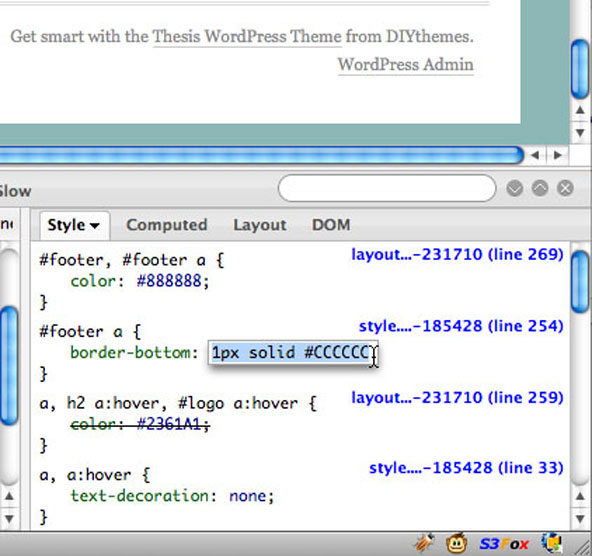
Figure 2. When you click the CSS in Firebug, Firebug will let you edit it in real-time.
In the right-hand pane of Firebug, as shown in Figure 2, you can select the default value 1px solid #CCCCCC; of the border-bottom property, and replace it with the value you want—which is none. See figure 3.
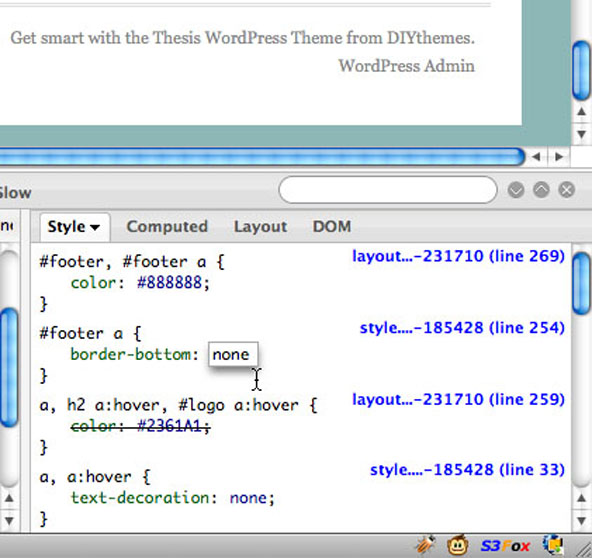
Figure 3. In Firebug, you can type over the existing styles without any problems.
As you change the value of border-bottom, you’ll see that the underline disappears from both of the footer links. Having confirmed in Firebug that your proposed style rule change will have the effect you want, you can now move to make the actual change by writing your style rule into custom.css:
.custom #footer a { border-bottom: none; }
How Firebug Lets You Emulate Your Favorite Websites
Let’s look at another hypothetical situation. Let’s say you see a website with some awesome widget styling and decide you’d like to emulate it on your own website. You could hire a web designer, but if you wanted to do it yourself, you can launch Firebug and see exactly what CSS styles are needed to create a similar widget.
For example, see figure 4:
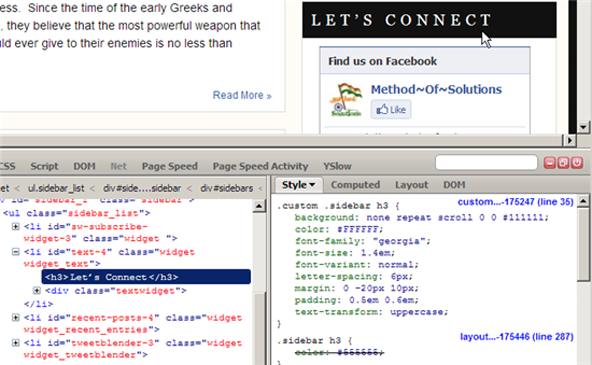
Figure 4. See how Firebug shows you the specific h3 styling associated with the widget?
As you can see, the styles associated with the widget are as follows:
.custom .sidebar h3 {
	background: none repeat scroll 0 0 #111111;
	color: #FFFFFF;
	font-family: Georgia;
	font-size: 1.4em;
	font-variant: normal;
	letter-spacing: 6px;
	margin: 0 -20px 10px;
	padding: 0.5em 0.6em;
	text-transform: uppercase;
}
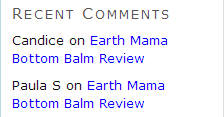
By default, in Thesis, your widget looks something like this:
To test the custom style from Figure 4, open up Firebug, click on your widget with the inspect button, and paste the styling into the CSS section. And, just as in the footer link example earlier, Firebug will show you what it would look like on your site:
The title is completely changed! It’s close to what you want, but do you see how the widget title is a little wide for the sidebars you’re using? You can edit the rules you are testing in Firebug until you are satisfied with the result. In this case, you would edit the values for margin:
.custom .sidebar h3 {
	background: none repeat scroll 0 0 #111111;
	color: #FFFFFF;
	font-family: Georgia;
	font-size: 1.4em;
	font-variant: normal;
	letter-spacing: 6px;
	margin: 0 -11px 10px;
	padding: 0.5em 0.6em;
	text-transform: uppercase;
}
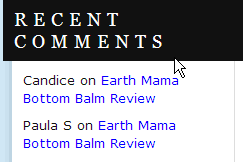
And the result:

Perfect! Now you have exactly what you want, all you’ll have to do is paste your style rules into your custom.css and you’ll be good to go.
Let’s note one other detail before leaving this topic. See the value with the line drawn through it (beside the cursor) in the screenshot below?
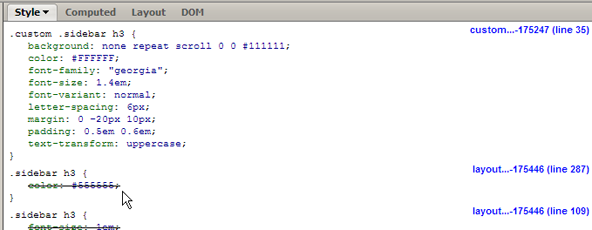
Figure 5. See how Firebug puts a line through CSS that no longer applies due to custom CSS changes?
That value, #555555 (a shade of gray), is the default color assigned to the text in the Thesis sidebar widget title. That value is struck out in the screenshot above because it has been overridden by the new color value of #FFFFFF (white) placed in a rule in custom.css. Firebug keeps you informed of the values you are replacing as you customize, and where those default rules are located.
The Bottom Line
FIrebug helps you, coders and non-coders alike, make design tweaks to your website without knowing much CSS. Sure, if you want to do something fancy, you’ll have to find the right CSS for the job, but Firebug does all the heavy lifting—searching through hundreds of lines of CSS—for you.
Have you used Firebug? If so, tell us about your experience in the comments!