This article is deprecated! Any technical information refers to software versions that are now obsolete. Please visit the DIYthemes Blog for current updates, or check out the old Thesis Blog for a treasure trove of website marketing insights.
If you power your website with Thesis, there is a powerful, but often under-used, feature called the Thesis Feature Box.
In short, the Feature Box can highlight just about anything! Do you want to greet your visitors with a welcome message? Feature box is perfect for that. Do you want a large video that spans across your content and sidebar? Feature box does that too.
Until now, the Feature Box was reserved for coding ninjas because it takes custom code to implement. However, in this article, you’ll find seven examples of different uses for the Feature Box, and how to implement them.
If you don’t use Thesis, now is the time to check it out. The Feature Box can help you push your website to new and exciting directions.
Either way, Let’s get started!
Before We Begin…
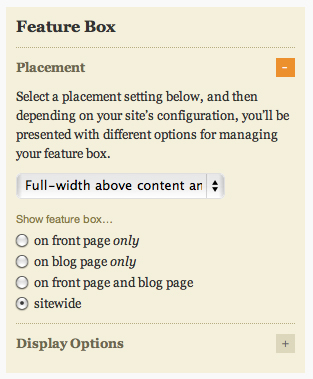
…Make sure you activate your Feature Box in the Thesis Options Panel. To activate, go to the WordPress Dashboard -> Thesis -> Design Options ->. When there, expand the Feature Box area on the far right column and choose where you’d like to display the box.
Note, for this tutorial, I set the box to display site-wide and full-width above the content and sidebars. If your needs are different, select the configuration that works best for you.
Thesis Feature Box Example 1 – A Static Welcome Message
We will start with something very simple—using the Feature Box to display a welcome message with text.
To keep things basic for now, we will hard-code the message into our custom_functions.php file directly (your custom_functions.php file is located within your /wp-content/themes/thesis_18/custom folder in your WordPress installation on your FTP server).
With the code below, the welcome message will display everywhere you have assigned the Feature Box to appear. If you chose to have it appear site-wide, this message will appear throughout your site.
Code for your custom_functions.php file
//-----------------------------------------------------------
// Example 1 - Static Welcome Message
//-----------------------------------------------------------

function static_welcome_message() {

?>

<div id="welcome-message" class="format_text">

     <h2>Hello! This is a large welcome headline.</h2>

     <p>This message and the headline above are coded directly into the custom_functions.php file.</p>

</div>

<?php
}

add_action('thesis_hook_feature_box', 'static_welcome_message');
Results of Example 1

Thesis Feature Box Example 2 – Editable Welcome Message
In the previous example, you learned how to add a custom welcome message in the Feature Box. However, who want’s to dig around code every time you change or update that content? Not me… so now I’ll show you an easier way to update your content.
In this example, I’ll show you how to create a WordPress query that populates your Feature Box with content from a WordPress Page (in this case, a page called “Welcome Demo Page”).
This all sounds much more complicated than it really is. In reality, it’s just as easy as the first example, you just need to follow a few additional steps, and the result is great. You can edit your welcome message right from the WordPress Dashboard.
Specifically we are outputting that page’s title (using <?php the_title(); ?>)
and the Page’s content (using <?php the_content(); ?>).
Although we have kept it very simple here and are just using text, you could put anything you want into that page’s content — text, images, a video, etc. That content would then show up in the Feature Box.
Code for your custom_functions.php file
//-----------------------------------------------------------
// Example 2 - Welcome Message Editable from a WordPress Page
//-----------------------------------------------------------

function welcome_message_from_page() {

     $welcome_query = new WP_Query('pagename=welcome-demo-page');

     while ($welcome_query->have_posts()) : $welcome_query->the_post();

?>

<div id="welcome-message" class="format_text">

     <h2 class="page-title"><?php the_title(); ?></h2>

     <?php the_content();

     endwhile; ?>

</div>

<?php }

add_action('thesis_hook_feature_box','welcome_message_from_page');
Results of Example 2

Thesis Feature Box Example 3 – A Featured Image
This is similar to Example 1, except now we will feature an image instead of text. You might want to display a featured image across your entire site (perhaps instead of the standard header background image approach), or, more powerfully, you could use conditional statements to have specific featured images appear on specific posts or pages (as we will see in the next example).
Though this is example isn’t especially complicated, it serves to remind us that the Feature Box can be home to images and other multimedia content as well as text or posts.
Notice also that the image we are using here is automatically generated from the website www.dummyimage.com, which is a handy service for generating placeholder images for use in examples like this!
Code for your custom_functions.php file
//-----------------------------------------------------------
// Example 3 - Featured Image
//-----------------------------------------------------------

function featured_image_feature_box(){
?>

	<img src="https://dummyimage.com/897x300/000/fff&text=Featured+Image+For+Example+3" />

<?php }

add_action('thesis_hook_feature_box','featured_image_feature_box');
Results of Example 3

Thesis Feature Box Example 4 – Feature Box with Conditional Content
We have previously mentioned using WordPress conditional statements to display different content in the Feature Box on different posts and pages. In this example we will learn how to do just that.
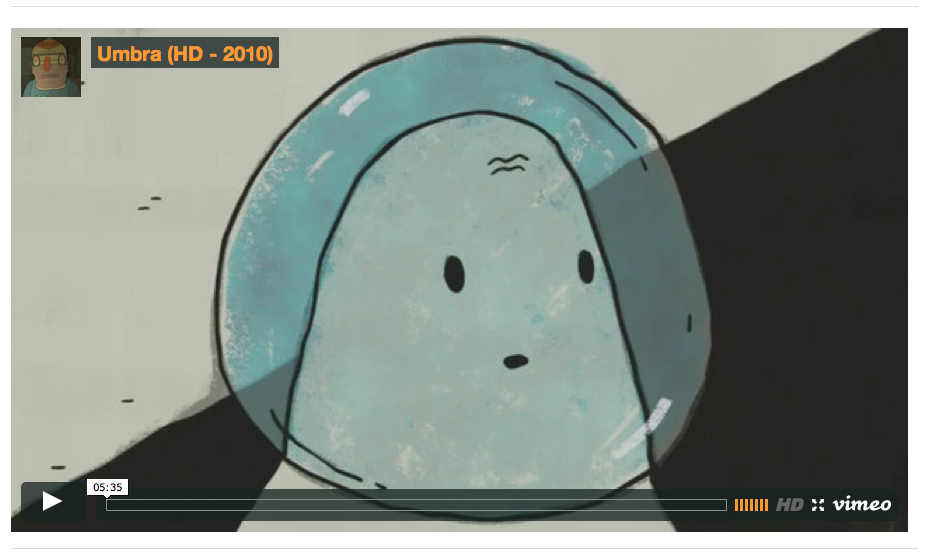
Using the code below, the Feature Box will display either a featured image (the same as in example 3) or a featured video depending on the current page. Since we’ve already seen the featured image in example 3, let’s see what it looks like with a featured video embedded from Vimeo.
Notice also that here and in subsequent examples the page names we are using (e.g. ‘feature-box-example-3’) do not correspond to actual pages, but are meant to keep the code readable. If you were implementing this on your own site, you would enter the names of your own real pages there.
Code for your custom_functions.php file
//-----------------------------------------------------------
// Example 4 - Conditional Feature Box Content
//-----------------------------------------------------------
function conditional_feature_box(){
if (is_page('feature-box-example-3')){ ?>
<img src="https://dummyimage.com/897x300/000/fff&text=Featured+Image+For+Example+3" />
<?php } elseif(is_page('feature-box-example-4')){ ?>
<iframe src="https://player.vimeo.com/video/14844291?byline=0&color=ff9933" width="897" height="505" frameborder="0"></iframe>
<?php }
}
add_action('thesis_hook_feature_box','conditional_feature_box');
Results of Example 4
Thesis Feature Box Example 5 – Multimedia Box Inside Feature Box
We have shown that we can display any sort of text, images, or video in the Feature Box, and that we can do it with a high degree of control by using the Feature Box Settings on the Thesis Design Options screen and the use of WordPress conditional statements.
Now let’s have some fun by combining the Feature Box with another cool feature of Thesis – the Multimedia Box! Like the Feature Box, the Multimedia Box is essentially a container for arbitrary content (text, images, videos, code, etc). And, fortunately, the code for adding it to the Feature Box is as simple as could possibly be.
One thing the Multimedia Box has that the Feature Box lacks, though, is the ability to directly control what displays in the Multimedia Box on a post-by-post or page-by-page basis from the WordPress Dashboard. We’ll get into that in the next example; for now let’s simply place the Multimedia Box inside the Feature Box using the default behavior of rotating images (these images are taken from your themes/thesis_18/custom/rotator folder).
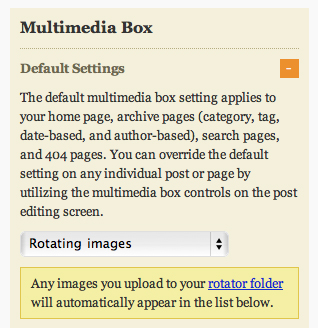
Note that if you changed the Multimedia Box’s behavior on your Thesis Design Options panel, what you see might be different from what is above. You can always go back to Thesis Design Options -> Multimedia Box to change what the Multimedia Box displays by default.
Code for your custom_functions.php file
//-----------------------------------------------------------
// Example 5 - Using Multimedia Box inside Feature Box
//-----------------------------------------------------------

function multimedia_feature_box(){

	thesis_multimedia_box();

}

add_action('thesis_hook_feature_box','multimedia_feature_box');
Results of Example 5

Thesis Feature Box Example 6 – Multimedia Feature Box Override
As mentioned, the real power of using the Multimedia Box inside the Feature Box is the ability to specify content for the Multimedia Box on a post-by-post or page-by-page basis from the WordPress Dashboard, yet still use the default Multimedia Box behavior if you do not have specific featured content for a given post or page.
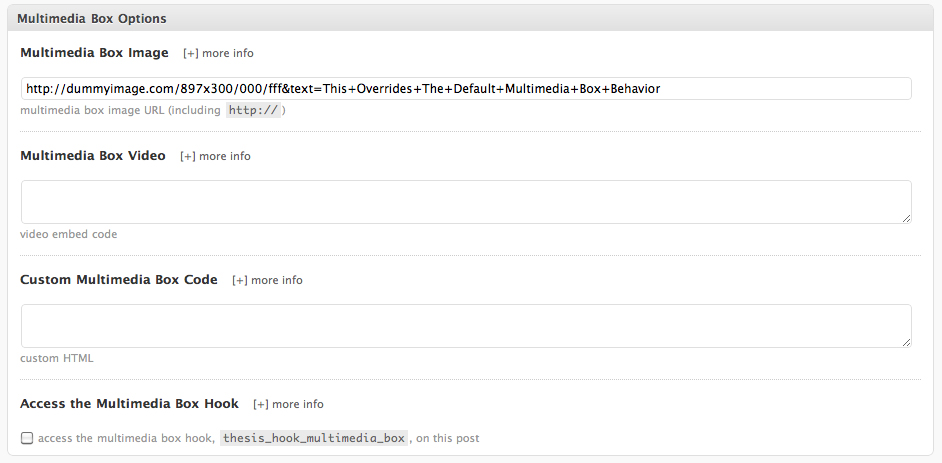
In this example, the Multimedia Box is hooked into the Feature Box and is set to show rotating images by default. On this particular page we have over-ridden that behavior by specifying an image in the Multimedia Box Options panel on this post’s Edit page on the WordPress dashboard. We could have easily done the same with a video or other code.
The example code here is the same as in Example 5, but this time we have included a conditional statement to highlight that we have one page which uses the default Multimedia Box behavior (example 5) and another page with a manually specified image (example 6).
Code for your custom_functions.php file
//-----------------------------------------------------------
// Example 6 - Using Multimedia Box inside Feature Box
//-----------------------------------------------------------

function multimedia_feature_box(){

	if (is_page('multimedia-feature-box-example-5') || is_page('multimedia-feature-box-example-6') ) {

		thesis_multimedia_box();

	}
}

add_action('thesis_hook_feature_box','multimedia_feature_box');
Results of Example 6
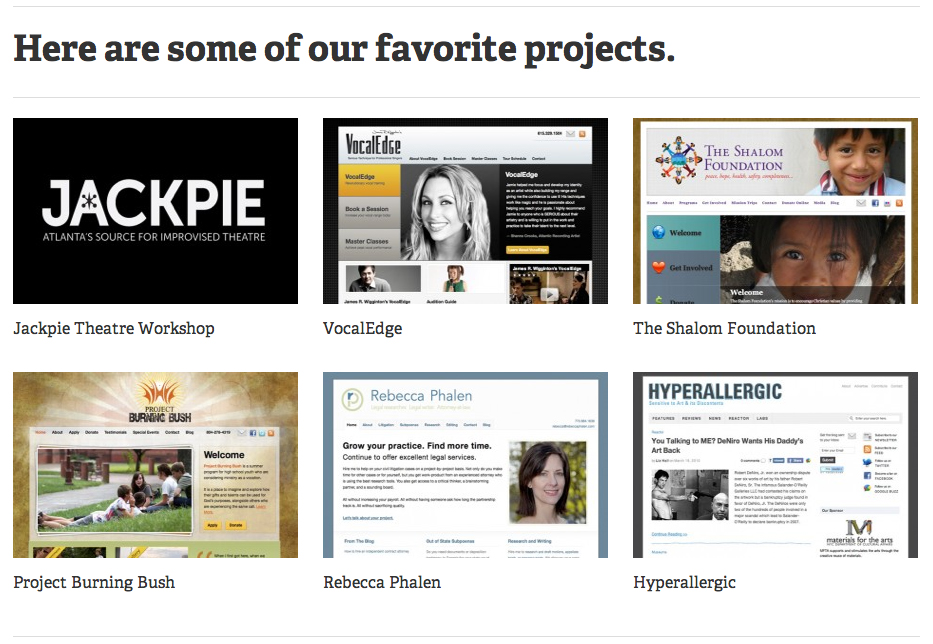
Thesis Feature Box Example 7 – A Featured Portfolio Page
Now we will apply what we have learned to create something a little more sophisticated. This example shows how you could create a nice looking portfolio section within your Feature Box by using WP_Query to grab six posts which are in a specific category (“Work” here, but might be “Portfolio” or something else for you). In this example we are further restricting our query to posts which are also tagged “Featured” – however for your own purposes you could include just a category, just a tag, both as we have done here, or include neither and simply grab your most recent posts.
This example also uses Thesis Post Images, so make sure to define post images for any posts you plan to use with this example. Covering Post Images is beyond the scope of this article, but there are many great resources explaining how to use Thesis Post Images both on DIYthemes.com and elsewhere on the web.
The output from this example is complex enough to require some CSS to look nice (provided below).
Code for your custom_functions.php file
//-----------------------------------------------------------
// Example 7 - Portfolio Page
//-----------------------------------------------------------

function get_featured_work_demo() {

if (is_page('portfolio-page-example-7')){

     $portfolio_query = new WP_Query('tag=featured&category_name=Work&posts_per_page=6'); ?>

		<h2 class="welcome-headline">Here are some of our favorite projects.</h2>

     	<ul class="portfolio-list-demo">

          <?php

               $count = 0;

               while ($portfolio_query->have_posts()) : $portfolio_query->the_post();

               $post_image = thesis_post_image_info('thumb');

               $count++;

           ?>

            <li class="demo-item" id="item-<?php echo $count; ?>">

                      <a href="<?php the_permalink(); ?>">

                           <?php echo $post_image['output']; ?>

                       </a>

                       <h3 class="featured-project-title">

                            <a href="<?php the_permalink(); ?>"><?php the_title(); ?></a>

                       </h3>

                       <p class="featured-project-summary">

                              <?php // the_excerpt(); ?>

                       </p>

          	</li>

          <?php endwhile;

          //Reset Query
          wp_reset_query();

          ?>

     </ul>

     <?php }
}

add_action('thesis_hook_feature_box','get_featured_work_demo');
Code for your custom.css file
/* EXAMPLE 7 - PORTFOLIO PAGE */

.custom #feature_box ul.portfolio-list-demo{
	margin-top: 2em;
	padding-top: 1em;
	list-style-type: none;
	overflow: hidden;
	border-bottom: 1px solid #ddd;
	}

.custom #feature_box ul.portfolio-list-demo li{
	float: left;
	margin-right: 25px;
	width: 285px;
	}

.custom #feature_box ul.portfolio-list-demo li img{
	width: 285px;
	}

.custom #feature_box ul.portfolio-list-demo li#item-3,
.custom #feature_box ul.portfolio-list-demo li#item-6{
	margin-right: 0 !important;
	}

.custom #feature_box ul.portfolio-list-demo li h3.featured-project-title{
	margin-top: 1em;
	margin-bottom: 2em;
	font-size: 16px;
	}

.custom #feature_box ul.portfolio-list-demo li h3.featured-project-title a{
	color: #555;
	}
Results of Example 7
Conclusion
That’s it! I hope you’ve enjoyed this tutorial on the Thesis Feature Box and that it has given you some new ideas for use on your sites or those of your clients.
Thanks to Chris Pearson and the DIYthemes crew for creating an awesome product in Thesis, and thanks to Derek Halpern for giving me the opportunity to share some ideas with the Thesis community.