This document is deprecated! The information on this page refers to a Thesis version that is now obsolete. Please visit the Thesis Docs for current documentation.
WordPress allows two primary kinds of content publishing, posts and pages.
The differences between posts and pages are not immediately clear to many new users of WordPress. In short, a post is assigned to a category, whereas pages are either standalone or “child” pages of a structure similar to a category.
When a new post is published, posts are often picked-up more quickly than pages, because posts are part of a “feed” — as a result, posts are often faster to get into search engines like Google.
From a more philosophical standpoint, posts are typically appropriate for time-sensitive content when compared to pages. Comments on posts are usually expected, and comments on posts tend to be higher-volume than the comments, if any, on pages.
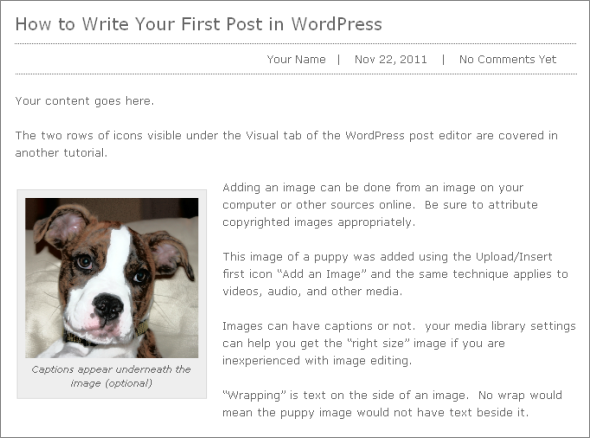
If any of that “posts versus pages” talk is confusing, don’t worry about it for now. We’re making a post — so we’re beginning from nothing and ending with something like this!
As a very loose guideline, create a post when you have something topical and timely to share with the world. If the post ends-up turning into a 4,000 word term paper — especially if the content will continue to be relevant years from the time of publication — then you could consider making the entry a page instead.
But again, don’t stress. Your first post can be as short or long, as “breaking news” or “evergreen” as you like. What’s important is to get it out there!
By default, your first post will fall into the “Uncategorized” category — all posts have at least one category, and the recommendation is to keep a post in just one category. If a post “feels” like it belongs in a dozen categories, it’s a good idea to either tighten the scope of the post, or to reconsider the breadth of each category you’ve created.
Your First WP Post — Getting Started
For your first-ever WordPress post, we’ll assume that the “Uncategorized” category is good enough for now. While you don’t want to change a post’s category assignations without reason, you can change this first post’s categorical relationship later, as you begin to decide which categories make good sense for your blog or web site.
First-off, you need to be logged into your WordPress administration area. Most of the time, this will be your domain name + /wp-login.php, so for example, it could be http://www.yoursite.com/wp-login.php and once there, you enter your login credentials as below:
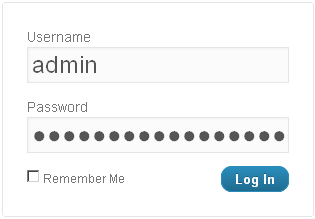
And now you get into your WordPress administration area. You’ll see a “control center” dashboard, but the focus here is on the left sidebar.
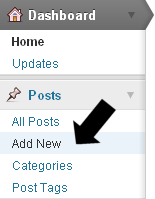
Primary Actions of the WordPress Post Content Editor
To add a new post, click on “Posts” — if the panel is not already opened — and then click on “Add New” to begin composing your first WordPress post.
You’ll now see a composition window — towards the top and center of your screen — where you’ll begin by entering a title for your post. Your post title can be as short or as long as you like, but as a rule of thumb, 5-15 words is about right.
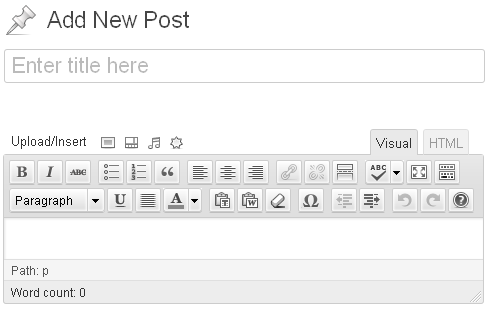
For beginners, it’s recommended that the post title be descriptive and not “cute” or off-topic in relation to the post’s contents.
Once you have a title entered, and presuming you have “pretty permalinks” turned on under your WordPress > Settings > Permalinks, you should see the “slug” appear.

The “slug” is the permanent link to your new post. Oftentimes, if your title was fairly long, the “slug” is longer than you’ll want. Click “Edit” as shown below, and trim the slug down to a few words. Removing words like “the” or “in” often helps.
Summarizing the title is the most common method, but your slug can be anything you want — though it’s recommended you avoid spaces and capital letters.
You can edit the permalink slug of your post as much as you want at this stage — but for various reasons, it’s best not to edit the “slug” after publication.

Your first WordPress post now has a title and a permalink “slug” that will be the unique “link” to your post’s content once it is published.
Now for the content of your post. That’s all yours! Aside from some basic tips, such as breaking paragraphs into easy-reading sizes, your content is unique, and it’s yours to add and edit and agonize over until you’re ready to go beyond the post contents and into additional publishing steps.
Most WordPress users select the Visual Tab of the post content interface at first. To learn more about what the two rows of icons can do for your post content, visit “WordPress 101 – Visual Post Editor” for full details.
Aside from paragraphs of text, you may also want to add images, videos, audio, or other media to your first WordPress post.

Images are an excellent way to enhance the meaning of the text copy of your post contents, and to break-up long segments of text — just like the image above does.
Videos, audio, and other media can be used effectively, but for your first post, adding an image or two is plenty to get your feet wet.
Here’s what an image added to your first WordPress post will look like in the context of the Visual tab’s post editor window:
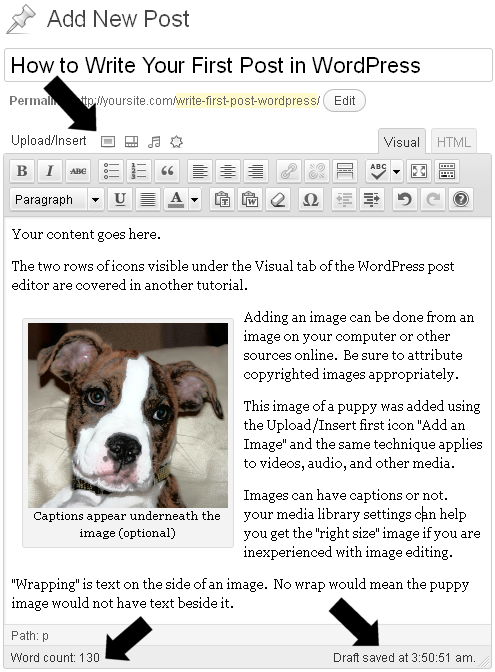
The two bottom arrows show items of note — your word count is updated as you type, and — by default — a draft save of your WordPress posts is performed automatically every few minutes. Drafts can also be saved manually, and we’ll see exactly how — once we get into the right-hand section of the post editing dashboard.
To add an image to your post, use the Upload/Insert section’s four icons — the area the first arrow in the image above is pointing to.
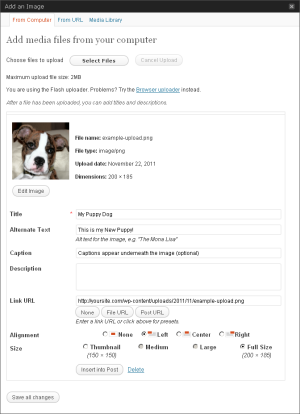
That first icon, “Add an Image” — this descriptive text will appear if you hover your mouse over the icon — provides a simple way to upload or point to existing image locations.
Clicking the “Add an Image” icon will open an overlay screen to control your image. The image management “pop up” appears like this:
Note: to view this screen capture at a higher resolution, click the image above.
Right-Side Actions of the WordPress Post Editor
So far, you’ve done a great job of creating a draft of your first WordPress post.
But your first post can’t hide forever — now it’s time to publish the post live!
There are three sections on the right side of your first WordPress post — Publish, Categories, and Tags.
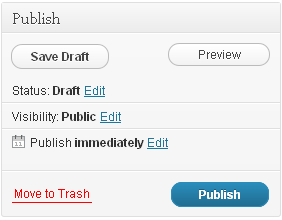
Publish is the most dynamic of these options for post management.
You can save a draft at any time — a good idea, although saving drafts hundreds of times can cause database performance issues over time. A couple of draft saves for a post is usually sufficient.
A nice feature is the ability to Preview the post — this shows you more closely how it will appear once live on your site.
And, importantly, you can Publish the post once you’ve previewed, made any necessary edits, and are ready to go live.
For now, hold-off on publishing your first post until you’ve considered the other two boxes below Publish.
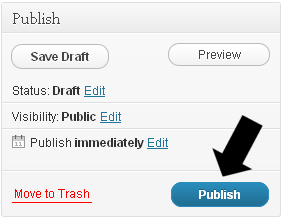
There are three “edit” text links in the Publish section. For your first post, these are probably good enough — meaning you don’t need to edit them at all. However, in the image below, you can see the expansion of all three “edit” links shown as they would appear if “edit” were clicked.
The status of the post is “draft” until you publish it (this will change automatically once you hit Publish).
Visibility should be “public” if you want to share your first post with the entire world — and while you could “stick” the post to the front page, for your first post, let’s keep it simple. Your first post will be “at the top” anyway, just as a sticky post would be.
Finally, while you could schedule publication of your first post for tomorrow or next month, we’ll presume you want your first post “out there” as soon as possible.
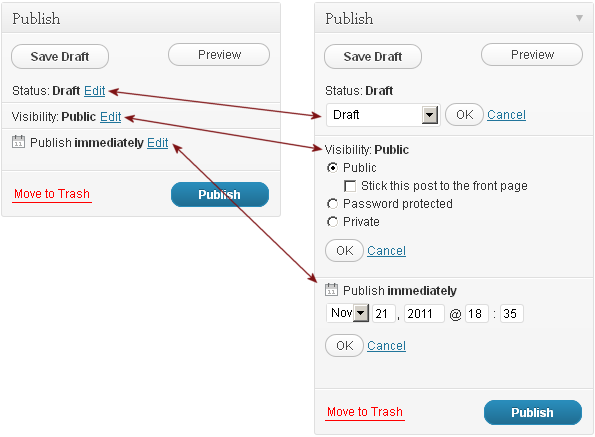
See the red link? You don’t want to move your first post to the trash, right? Well okay, maybe there’s a bit of stage fright, this is your first WP post, after all — but no, you don’t really want to trash it.
In fact, you want to Publish this post — but hold that thought while we quickly glance at the remaining post-related options on the right side.
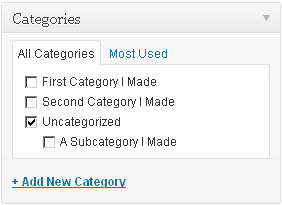
Categories are structures for your posts. Highly recommended is a relationship of one post to one category. If your first WP post is about your new puppy, you could make a category for your new puppy, or for puppies in general — but this only makes sense if you plan to have at least 10-15 other posts in this category.
Categories can contain sub-categories, too. You can choose “Add a New Category” to create a category, or add a sub-category, for this first post.
However, sub-categories are often a fast road to chaos, so it’s suggested you stick to adding one category — or simply using “Uncategorized” for this first post — it’s “checked” (and is the only category checked) in the sample image above.
Post Tags — the final step before you go back up the right side and click “Publish” on your first WordPress post is to look at the Post Tags area.
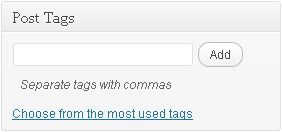
Notice the “look” part — it’s recommended you leave Post Tags blank for your first post.
Reason being, Post tags can be useful in small, careful doses, but, as with categories — in fact, moreso — tags can quickly become disorganized. A thousand one-time tags are useless for your site visitors as navigational or structural aids.
And contrary to popular belief — okay, so it’s a belief your author just invented — leaving the Post Tags blank will not result in an audible scream from WordPress when you finally hit Publish.
Leave the Post Tags blank for now, move back up to “Publish” and click the blue Publish button.
Congratulations, your first WordPress post is now live for all the world to see!
