There are 3 ways to add scripts to Thesis. The method you choose will depend on the location you want the script to appear:
- Document
<head>— HTML Head Scripts - Before closing
</body>tag — Footer Scripts - Anywhere else inside the HTML
<body>— Custom Hook
1. HTML Head Scripts
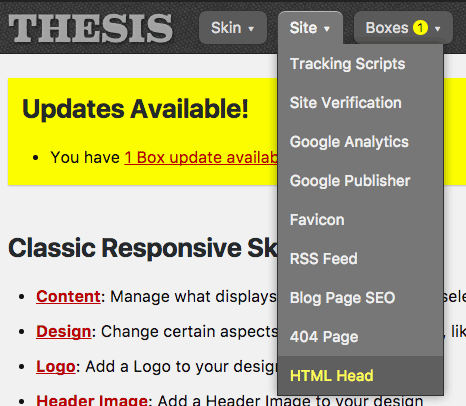
If you have scripts that belong in the document <head>, you’ll want to paste them into the Site Menu → HTML Head → Head Scripts Box.
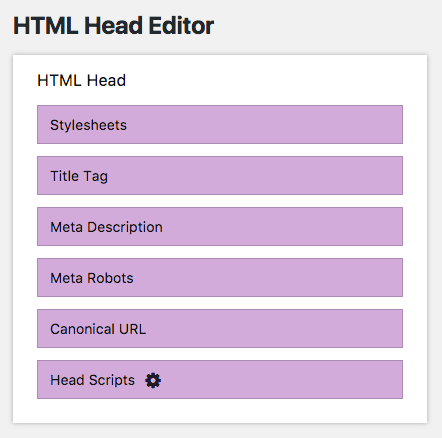
Once on the HTML Head Editor screen, hover over the Head Scripts Box and look for the gear icon to appear. Click on it to access the options for the Head Scripts Box.
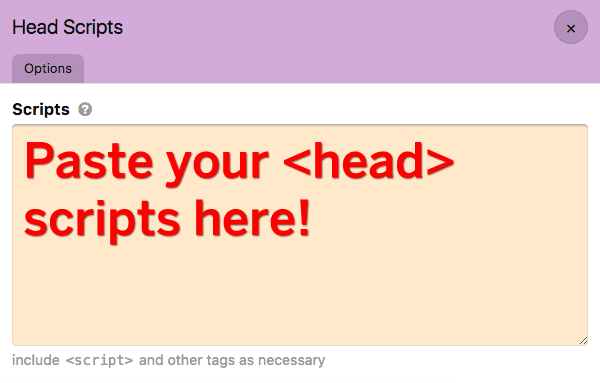
Next, paste your script code into the provided field:
After pasting your script code, be sure to close the Head Scripts options, and then click the green save button on the HTML Head Editor screen.
You can now check your site to see if your scripts are appearing in the document <head> as expected.
2. Footer Scripts
If you have scripts that belong just before the closing </body> tag (an efficient location where they will not block page rendering), you’ll want to paste these scripts into the appropriate field at Site Menu → Footer Scripts.
![]()
On the Footer Scripts screen, paste your script code into the provided field:
![]()
After pasting your script code, be sure to click the green Save Footer Scripts button.
When you’re done, you should check your site to see if these scripts are appearing before the closing </body> tag as expected.
3. Custom Hook
If you have scripts that belong anywhere else in the HTML document—such as ads in your sidebar—you’ll need to place these scripts via the secure and flexible custom hook method.
By its nature, the custom hook method implies the use of custom code, but don’t worry! It’s easy and fun, and I’ll walk you through every step of the process below.
First, when adding custom PHP code to your site, you have two options for where to place this code:
/wp-content/thesis/master.php/wp-content/thesis/skins/your-current-skin/custom.php
The master.php file is intended for customizations that will apply to your site regardless of the Skin you’re using.
By contrast, your current Skin’s custom.php file is intended for customizations that are only intended to apply to your current Skin.
These files exist to help you organize your customizations; it doesn’t really matter which one you use in this case. In other words, there is no right or wrong answer here.
The code you’ll be placing in your chosen customization file consists of two parts: function and hook. You will use the function to output your script code, and you’ll use the hook to determine where the code is output.
Let’s look at the function first:
function my_custom_ad_script() {
?>
[paste your script code here]
<?php
}
Easy, right? In the code above, give your function a descriptive name like my_custom_ad_script, and then paste your script code in the appropriate spot.
Next, let’s look at the hook:
add_action('my_hook_location', 'my_custom_ad_script');
To get your script to appear in the right place, you need to identify the proper hook location and then replace my_hook_location with this value. There are a couple of ways to do this:
- If you’re using an official Skin from DIYthemes, you can refer to the Hook documentation for that Skin. For example, here are the available hooks in the Classic Responsive Skin.
- No matter what Skin you’re using, you can always use the Skin HTML Editor to determine an appropriate hook location. (And if a location doesn’t already exist, you can create one!)
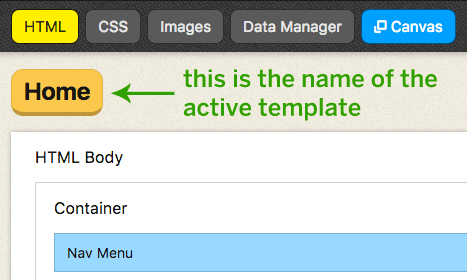
To illustrate the second method, we will determine hook locations at the top and bottom of the Sidebar in the Classic Responsive Skin. As a first step, open up the Skin Editor and make sure the HTML tab is active. The top of your screen should look like this:
Next, scroll down and locate the Sidebar container within the template:
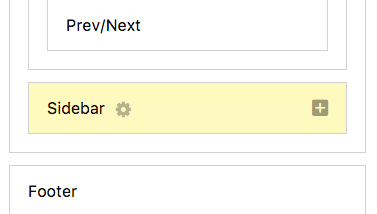
See the gear icon next to the Sidebar? Click on that to bring up the Sidebar Container options. Switch to the Admin tab, and then note the Display ID/Hook Name in the field indicated below:
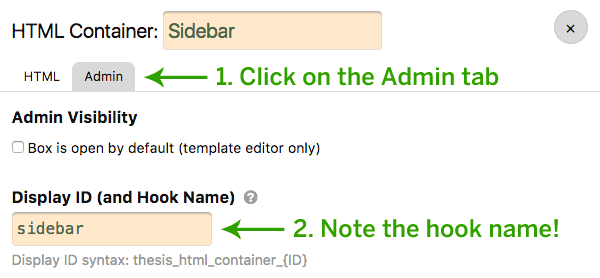
Pro tip: In the Skin Editor, all HTML Container Boxes have 4 hook locations:
- before the opening HTML tag
- after the opening HTML tag
- before the closing HTML tag
- after the closing HTML tag
In other words, if you want to find a hook location in the Skin Editor, you should be looking for Containers in your template(s).
In the image above, the Display ID/Hook Name is sidebar. If your Container doesn’t have a Display ID/Hook Name, you can provide one here (and then save the template), but make sure it’s unique!
Assuming our Hook Name is sidebar, here are the 4 available hook locations for the Sidebar Container:
hook_before_sidebarhook_top_sidebarhook_bottom_sidebarhook_after_sidebar
Now, if we want to place a script at the top of the Sidebar, we’ll use the hook_top_sidebar location. Our resulting hook code will look like this:
add_action('hook_top_sidebar', 'my_custom_ad_script');
Alternatively, if we wanted to place a script at the bottom of the Sidebar, we could use the hook_bottom_sidebar location:
add_action('hook_bottom_sidebar', 'my_custom_ad_script');
The bottom line is that once you know how to determine hook locations, you can inject code wherever you want!