Hallelujah! As of Thesis 2.4, it is no longer necessary to update CSS after updating your Skin.
Whenever Thesis Skin updates include revised CSS, you’ll need to take two steps to:
- get the new CSS; and
- adapt your current Design settings to this CSS.
Many Skin updates do not include CSS updates, so you will not need to do this every time you update a Skin. We’ll be sure to let you know if a specific update includes revised CSS, and then we’ll refer you back to this page as a reference.
The following procedure, which uses the Promo Skin as an example, may be applied to any of our Skins.
Step 1: Applying the Updated CSS
 After updating your Skin in the Manage Skins panel, navigate to the Skin Editor (either from the Skin menu or the Thesis portion of the WordPress Dashboard menu).
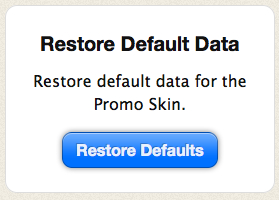
Click the Manager button in the horizontal menu at the top of the Skin Editor. Once in the Data Manager, click the blue Restore Defaults button in the Restore Default Data module.
Although it is not shown in the following graphic, Editor CSS was added in Thesis 2.2 and should be included here, too.
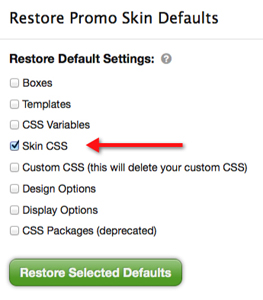 This will pull up a ‘Restore Default Settings’ panel for your Skin. Uncheck all options except for Skin CSS and Editor CSS, and then click the green Restore Selected Defaults button.
A confirmation panel will then display, asking ‘Are you sure you want to do this?’ This panel will also inform you that an automatic backup of your current settings will be created in case you decide to revert. Click the OK button to complete the process. Your Skin will now include the updates for Skin CSS and Editor CSS.
Step 2: Re-saving Design Options Settings
After applying the CSS updates, navigate to the Skin Design panel (Thesis Admin → Skin → Design) and click the green Save Design Options button.
That’s it! You have now applied your current Design customizations to the updated Skin and Editor CSS.