After installing Flex, you may wish to explore other key options to customize the Skin for your needs.
Navigation Menu
Locate and then click the Flex Menu link, and on the ensuing page, you’ll be able to specify a WordPress navigation menu to use in your Skin.
Please note that if you have not yet created a menu, links to your WordPress pages will show by default. Generally, this results in an ugly menu, so we recommend creating one now by visiting Appearance → Menus in your WordPress dashboard.
Logo
In addition to a header image, you can also supply an optional logo by visiting Thesis Home → Skin → Logo.
On this page, you can upload a new logo image, or you can choose an existing image from your WordPress Media Gallery to serve as your logo.
It’s a good idea to test your site on a few different devices after adding a logo. As of 1.1 your logo is no longer capped at a specific height, but this will mean you will need to test out your logo at different sizes to achieve the desired look.
Pro tip: For best results, we recommend using a .png image with a transparent background.
Home and/or Front Page Setup
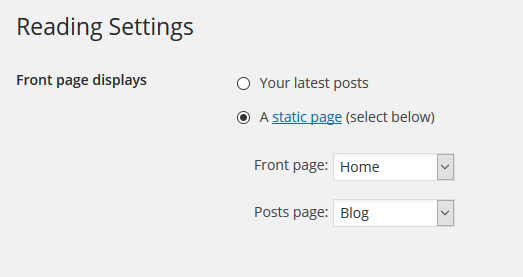
The Flex home page is dependent upon your options in Settings → Reading. To take advantage of all Flex features, you’ll need to use a static front page.
Configuring the Front Page
To configure the front page, in the WordPress admin interface select Pages and then select edit on the page defined as the Front Page.

Once you are on the Front Page editing screen you will be presented with the following options.
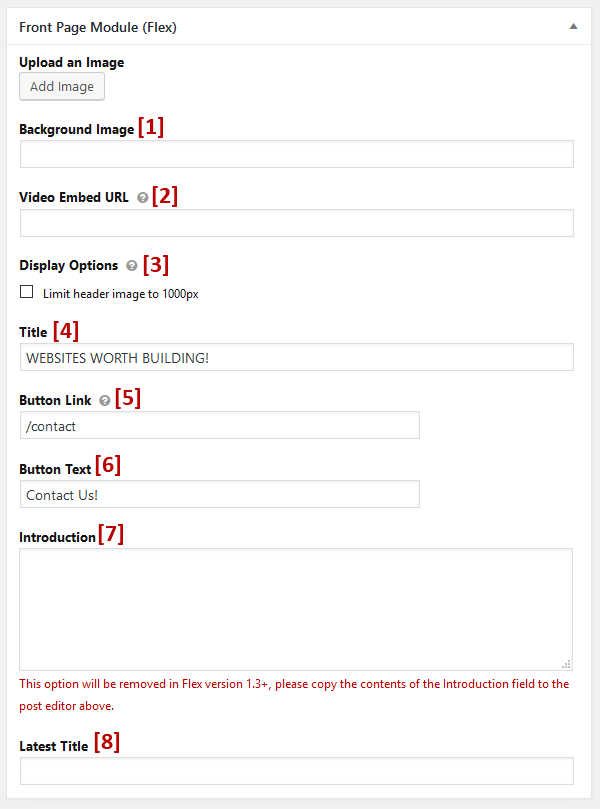
You should first replace the default Background Image[1] with something more suitable for your website.
The Video Embed URL [2] can accept a video embed URL (not a browser URL).
Display Options [3] will limit the container for the featured image to the value of $w_total which is your sidebar and content width, useful for images that are not required to span the full width of the page.
Optionally you can provide a Title[4] and Button Link[5] to link to somewhere important as well as customize the Button Text[6].
Below the header image is an introductory section that allows you to add an Introduction[7]to welcome visitors and place some important content.
Note: The Introduction option has been deprecated in favor of using the WordPress Post Editor to supply content.
Finally you can customize the Latest Title[8] which will display above the Front Page Latest Posts which can be customized by going to Thesis → Skin Content → Front Page Latest Posts.
Customizing your Footer
Flex has two custom boxes each with their own customization options for you to customize your Copyright & Attribution as well as your Social Follow Links.

Advanced Design Customizations
All Thesis Skins come with a Custom CSS Editor, and the Flex Skin is no exception. If you wish to make design customizations that cannot be accomplished from the Design options page, then you should visit the Custom CSS Editor (Thesis Admin → Skin → Custom CSS) and place your custom styles there.
Skin Content Control
Want to display author avatars on your posts? How about categories or tags?
Using the Flex Skin Display Options, you can quickly and easily control the display of some of the items in your Skin. These options are located atop the Skin Content page, which you can access by visiting Thesis Admin → Skin → Content.
If you find yourself asking, “How do I show [x]?” or, “How do I get rid of [x]?”, then you’ll want to look at the Display Options to see if there’s a one-click-easy way of achieving your goal.
Custom Templates, Including Landing Pages
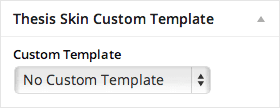 The Flex Skin comes with 2 custom templates that give you maximum flexibility and control over the way your pages appear. To set a custom template on any post or page, look for the Thesis Skin Custom Template section in the right-hand column of your post editor.
With the No Sidebar (Post) and Now Sidebar (Page) template, you can eliminate the sidebar.
The Landing template, you can eliminate visual noise and distracting links, thereby encouraging visitors to focus exclusively on your content. This is great for sales pages, sign-up pages, or any other scenario where you need visitors to focus on a call-to-action.
Usage note: If you set a custom template on a post or page, that selection is made relative to the active Skin. If you switch your Skin in the future, any posts or pages that were running a custom template under the previous Skin will revert to default templates in the new Skin.
Widget Areas
Out of the box, the Flex Skin comes with a widget area where you can place custom widget content like email signup forms, links, search boxes, ads, and more.
Looking for More?
Head on back to the main Flex Skin documentation and see if you can find what you need.