Note: Please install and activate the AWeber Box before proceeding with this tutorial.
Integrating AWeber with your Thesis site has never been easier. This tutorial will show you the basics of setting up the AWeber Email Signup Box so you can start running email campaigns on your site.
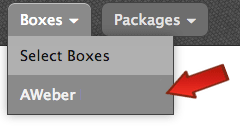
After you’ve installed and activated the AWeber Box, visit Thesis Admin → Boxes → AWeber to connect your Thesis site to your AWeber account.
Locate the big blue button shown below, and then click it to proceed to AWeber, where you’ll receive an authorization code.

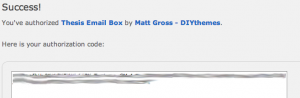
AWeber will ask you to log in, and then they’ll show you your authorization code:
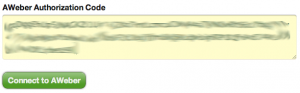
Copy the authorization code, and then paste it in the corresponding text box on your AWeber Box settings screen, as shown below. Next, click the “Connect to AWeber” button to connect your AWeber account to your Thesis site.
Once your AWeber Box is connected, you’ll need to set 3 simple options: a default email list, a “thank you” page (where new subscribers will be sent), and an “already subscribed” page (where users who are already on your list will be sent if they attempt to re-subscribe).

You can use any of your WordPress pages to serve as your “thank you” and “already subscribed” pages, so you have complete control over this content.
After setting up the default options, every AWeber Box you deploy in your templates (regardless of the Skin you’re using) will be pre-populated these options for convenience.
Also, once you’ve added an AWeber Box to a template, you’ll be able to control its options on the Skin Content page, without having to venture back into the Skin Editor to find it every time you want to change something.
AWeber Form ID
The AWeber Form ID is part of the equation that allows impressions and submissions to be properly tracked. This will tell you the conversion rate for any given form.
Locating the Form ID is simple:
- Select or create a list.
- Navigate to “Sign Up Forms”.
- Select or create a Sign Up Form (note: if creating a new form you will need to save it before moving on).
- In the address bar of your browser, copy the 10 digit number on the very end of the URL. It will be in the form:
https://www.aweber.com/users/web_forms/edit/1234567890
(note: on new forms it may look slightly different but the number will be at the end of the URL). - Now, go back to your website and paste the number into the Web Form ID field of the AWeber box.
- Save the options.
Tracking Pixel
In order to properly calculate conversions, you will need to supply the AWeber tracking pixel id. Note: each instance of the AWeber box you deploy on a site will need a separate id. That means in AWeber you will need to create a Sign Up Form for each location you intend to track on your site.
To locate the tracking pixel id:
- Select or create a list.
- Choose the Sign Up Forms tab.
- Create or select a web form.
- Save the form and navigate to Step 3 (Publish).
- Click “I will install my form”.
- Click raw html version.
- Deselect “Include beautiful form styles”.
- In the text area containing HTML code, locate the <img> tag. It will have an attribute named “src”.
- Locate the URL that begins: https://forms.aweber.com/form/displays.htm?id=
- Copy the characters to the right of “id=”.
- Navigate back to Thesis and paste the characters into the Tracking Pixel ID field.
- Save the options.